How to Trim Your Dog’s Toenails
When you hear a clack-clack-clack as your dog walks across the tile floor, it’s time to clip your dog’s nails.
STEP ONE: Assess the Nail
The general rule to follow is that the nail, which curls downward, should be even with the paw pad. Whatever is hanging over the paw pad must be clipped.
STEP TWO: Understand Basic Paw Anatomy
The blood and nerve supply for the nail is located in the center of each toenail and is called the “quick.” For dogs who have white nails, the quick will look like a pinkish area in the middle of the nail. Dogs who have black nails, however, do not have a quick that is easily visible and you will have to proceed slowly and with caution to avoid cutting the quick.
STEP THREE: Safely Secure Your Dog
Once you are ready to begin trimming your dog’s nails, put them in your lap or on a table. Some dogs may require a form of gentle restraint to keep them still while you administer their pedicure.
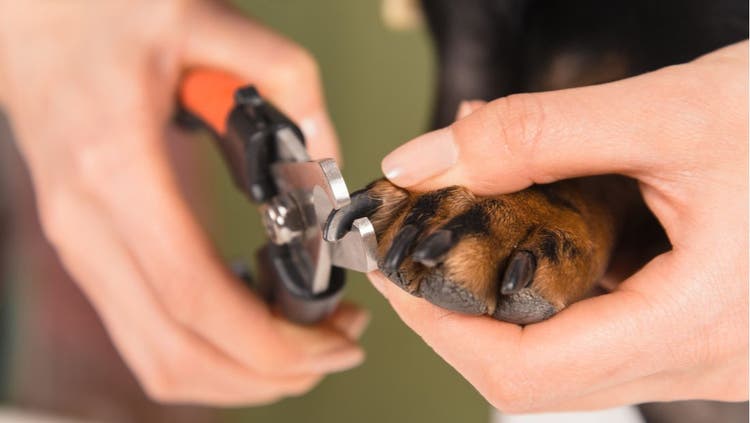
STEP FOUR: Use a Nail Trimmer Specifically for Pets
Using a nail trimmer specifically made for pets, cut the nail below the quick on a 45-degree angle, with the cutting end of the nail clipper facing the end of the nail. In dogs with dark nails, make several small nips with the clippers instead of one larger one. Trim very thin slices off the end of the nail until you see a black dot appear towards the center when you look at it head on. This is the start of the quick, and it will need to be avoided.
STEP FIVE: Don’t Panic
Although your aim is never to hurt your pet, accidents can happen and you may cut into the quick. Silver nitrate products, which you can get at your veterinarian’s office or local pet store, or flour or cornstarch can be used to stop the bleeding.
Although this process might be scary to both of you at first, keeping your dog’s nails neat and trim can allow them to walk more comfortably, preserve their posture, and reduce the risk of injury.